My good friend Milena was so kind to give me a baby shower last week. I just wanted to post some pictures of her beautiful creations.
Her husband cut the wood for the cup cake stand and she wrapped the wood in a jungle theme. She also added a Giant C on top because I am going to name my baby boy Collin.I thought this was so clever because she can reuse these blocks for future parties.
We agreed that a dessert bar would be best for a Thursday evening shower. I am glad we did because it was a-lot less clean up. Look at her popcorn horns. Aren't they cute!
She wrapped vines around her light fixtures, I thought that was cute.
So finally here is the last picture I will post. Milena is on the left and I am on the right. This was the only picture that was remotely alright to post of me. I am due on March first and my face is looking pretty swelly so the rest of the pics will remain in my possession.
Thank you so much Milena and for all who came!
Connie
Wednesday, February 1, 2012
Friday, January 27, 2012
Mock Samoa cookies
I know what you are thinking "Yikes I can't believe she is posting a picture of these cookies". Well there is a
method to my madness. Believe it or not , the chocolate was not crackly yesterday and they are very tasty!
Anyway,so I was looking for a yummy recipe for my baby shower this week and I came across this wonderful "Samoa cookies" one here at Once upon a plate recipes.
Look how gorgeous hers look!
Alright so mine are a bit embarrassing! Anyway everything was going just great with the first cookie layer,I thought I had this in the bag. That was until the dreaded caramel topping ahhhhhhhhhh. I followed the recipe and I think I am just a bit slow because the mixture I made was so thick that it would not even stick to my cookie. It was not only thick,but it solidified like a rock! I tried to chew through it and I felt like my teeth were going to fall out. I wanted to throw the whole darn bowl across the room,but then that wouldn't be to lady like would it?
Well,I had some luck on my side yesterday,I happened to buy a second bag of caramels. GOOD THING!
Instead of melting them all at once,I decided to put in about 5-7 pieces at a time in the microwave and I added a bit of water. I then I added a small amount of the toasted coconut to the mixture and it worked out a-lot easier for me. I think now I might even try making them again. Now as for the crackly chocolate on top,I think I will use Wilton melting chocolates instead of semi-sweet chocolate chips next time.
Now I am not trying to bag on the recipe,it probably worked out very well for Mari over at "once upon a plate",and I am so very happy that she shared her recipe because I will try it again in the future.I am just keeping it real with my experience.
It is all rather funny really.
method to my madness. Believe it or not , the chocolate was not crackly yesterday and they are very tasty!
Anyway,so I was looking for a yummy recipe for my baby shower this week and I came across this wonderful "Samoa cookies" one here at Once upon a plate recipes.
Look how gorgeous hers look!
Alright so mine are a bit embarrassing! Anyway everything was going just great with the first cookie layer,I thought I had this in the bag. That was until the dreaded caramel topping ahhhhhhhhhh. I followed the recipe and I think I am just a bit slow because the mixture I made was so thick that it would not even stick to my cookie. It was not only thick,but it solidified like a rock! I tried to chew through it and I felt like my teeth were going to fall out. I wanted to throw the whole darn bowl across the room,but then that wouldn't be to lady like would it?
Well,I had some luck on my side yesterday,I happened to buy a second bag of caramels. GOOD THING!
Instead of melting them all at once,I decided to put in about 5-7 pieces at a time in the microwave and I added a bit of water. I then I added a small amount of the toasted coconut to the mixture and it worked out a-lot easier for me. I think now I might even try making them again. Now as for the crackly chocolate on top,I think I will use Wilton melting chocolates instead of semi-sweet chocolate chips next time.
Now I am not trying to bag on the recipe,it probably worked out very well for Mari over at "once upon a plate",and I am so very happy that she shared her recipe because I will try it again in the future.I am just keeping it real with my experience.
It is all rather funny really.
Monday, January 23, 2012
Addicted to Sarah's house

If you happened to miss this show check it out! She buys a house and renovates the whole thing including all the landscaping. Granted,she doesn't physically do all the labor and she has a bunch of money to throw down,but who cares. I think that is why I like the show so much.
Anyway check it out,I think you will enjoy.
http://www.hgtv.com/hgtv-sarahs-house/videos/index.html
Connie
Tuesday, January 17, 2012
Thank you Tuesday
Today I just wanted to say thank you to a couple of great gals who featured my Cinnamon bread last week.
Make sure you have a look at their blogs,you will not be disappointed.
Mandy over at the project queen throws a party every Tuesday and it is called "Turning the daunting into do-able". So Clever! You can find her blog here http://projectqueen.org/
The other lovely lady I would like to introduce you to is Kindra over at " At home with K". She is so sweet she has featured me twice and I owe her a big thanks! She hosts a party called "Terrific under 10 Tuesdays".
I think this is such a good concept and I like the challenge of making projects under $10. Have a look at her blog here http://athomewithk.blogspot.com/
Thank you again ladies and thank you all who are reading this,perhaps you will come join their parties as well.
Connie
Thursday, January 5, 2012
Pillsbury cinnamon swirl raisin bread
I haven't been doing a-lot of crafty things lately,but I have been doing a-lot of eating! Tomorrow I will be 8 months pregnant and I am really feeling it. The heaviness that is,but I figure I might as well enjoy the treats while I can for now! So today in the midst of my gluttonous rampage I am going to share a delicious recipe with you.
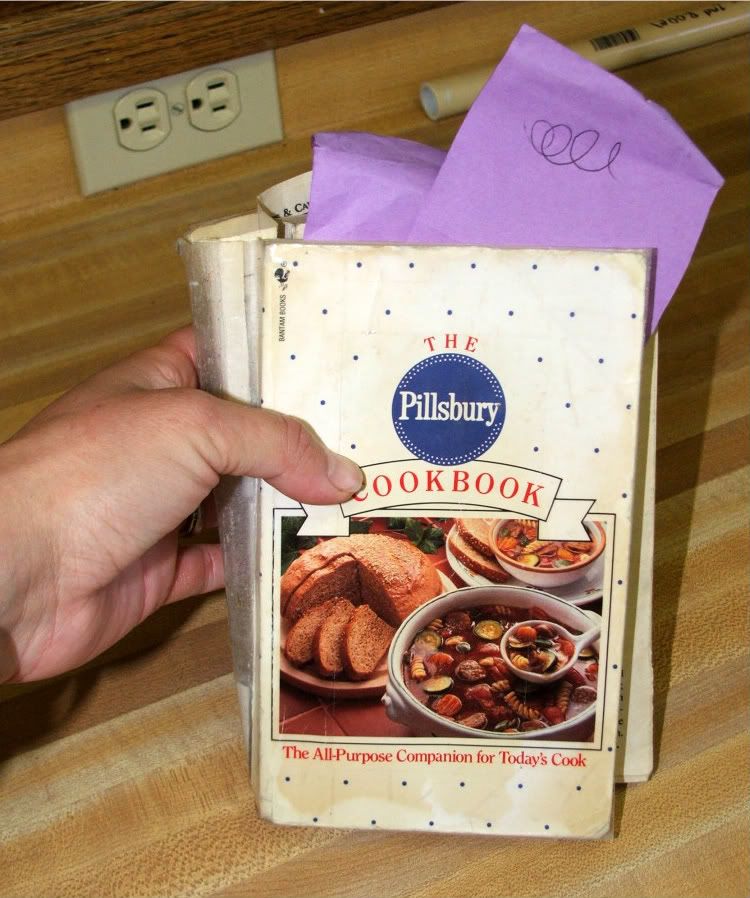
This recipe is derived from The Pillsbury Cookbook.
Can you tell that I have used this a bit in the past 10 years of my married life? Well anyway the recipe today is.............
Pillsbury cinnamon swirl raisin bread
Ingredients for dough
5-6 Cups all purpose flour (or bread flour)
3 Tblsp sugar
2 tsp salt
2 pkg active dry yeast ( I did two tblsp)
2 Cups warm room temp water
1/4 Cup oil or shortening
1/2 tsp cinnamon
1 cup raisons
Filling
1/4 cup granulated sugar
1 tsp Cinnamon
Melted butter or margarine
Topping ( I added this)
1/2 cup powdered sugar
About 1 tblsp milk
Warning: I have slightly altered this recipe from it's original version.
Step 1
Mix water,sugar and yeast in bowl. Let stand for about 10 min. (It should get nice and foamy).
Step2
In a separate bowl mix together salt,2 cups of flour and cinnamon.
Step 3
Transfer yeast mixture to a stand up mixer with a kneading hook. Add oil and dry mixture to the yeast. Start blending the dough together. Add in your raisins then slowly add in the additional flour until the dough does not stick to the sides. Add in about a 1/2 cup flour at a time. It shouldn't be really dry or sticky,but somewhere in between.
Step 4
Kneading
You have two options with kneading your dough.
Option A.
You can take it out of your mixer and knead your dough by hand on a floured surface for 8-10 minutes.
Option B.
Leave your dough in the mixer and let the dough hooks knead it for about 8 minutes. You will need to add little sprinkles of flour to the dough while it is mixing. I can usually tell when the dough is ready when it relaxes a bit.
Step 5
Make dough into a ball and transfer to a greased bowl. Cover the bowl loosely with plastic wrap that has been greased. Follow with a dry cloth to cover the top. Now set in a warm place for 45-60min until it is doubled in size.
To check your dough to see if it is ready,stick your finger in it and if it leaves an indent it is ready. If the indent doesn't stay then the dough is not ready.
Step 6
After dough has risen ,punch down dough several times to remove any air bubbles. Divide dough in half and shape into two balls.
Take one ball at a time and roll out into a 14x7 inch rectangle.
Now spread melted butter over the top and then sprinkle with the cinnamon sugar filling.
Step7
Starting with 7 inch side,roll up. Seal edges and place seem side down into a medium sized greased loaf pan. Now repeat step 6 and seven to make your other loaf.
Step 8
Cover and let rise for about 30min or until the dough is 1 inch above the pan edges.
Step 9
Uncover and bake in the oven at 375 degrees for 40-45 minutes or until the bread sounds hollow when tapped.
Step 10
After the bread has baked remove from the pan. Mix the powdered sugar and milk together in a small bowl to make a smooth glaze. Pour the glaze over the top of the hot bread. Allow the the bread to set for 30 minutes before cutting to get the best results.
All right,now it is time for you to give it a try.
Have a look at ,my first attempt at making this bread vs the second attempt.
Here is the second time around
Much better and so yummy! I hope you enjoyed this.
Go have a look at the parties that I will be joining!
Turning the daunting into do able
Weekend warrior
Debbie doos newbie party
Anything goes
Terrific under 10
Nifty thrifty tuesdays
Wow us wednesdays
Get your brag on
Weekend wanderer
This recipe is derived from The Pillsbury Cookbook.
Can you tell that I have used this a bit in the past 10 years of my married life? Well anyway the recipe today is.............
Pillsbury cinnamon swirl raisin bread
Ingredients for dough
5-6 Cups all purpose flour (or bread flour)
3 Tblsp sugar
2 tsp salt
2 pkg active dry yeast ( I did two tblsp)
2 Cups warm room temp water
1/4 Cup oil or shortening
1/2 tsp cinnamon
1 cup raisons
Filling
1/4 cup granulated sugar
1 tsp Cinnamon
Melted butter or margarine
Topping ( I added this)
1/2 cup powdered sugar
About 1 tblsp milk
Warning: I have slightly altered this recipe from it's original version.
Step 1
Mix water,sugar and yeast in bowl. Let stand for about 10 min. (It should get nice and foamy).
Step2
In a separate bowl mix together salt,2 cups of flour and cinnamon.
Step 3
Transfer yeast mixture to a stand up mixer with a kneading hook. Add oil and dry mixture to the yeast. Start blending the dough together. Add in your raisins then slowly add in the additional flour until the dough does not stick to the sides. Add in about a 1/2 cup flour at a time. It shouldn't be really dry or sticky,but somewhere in between.
Step 4
Kneading
You have two options with kneading your dough.
Option A.
You can take it out of your mixer and knead your dough by hand on a floured surface for 8-10 minutes.
Option B.
Leave your dough in the mixer and let the dough hooks knead it for about 8 minutes. You will need to add little sprinkles of flour to the dough while it is mixing. I can usually tell when the dough is ready when it relaxes a bit.
Step 5
Make dough into a ball and transfer to a greased bowl. Cover the bowl loosely with plastic wrap that has been greased. Follow with a dry cloth to cover the top. Now set in a warm place for 45-60min until it is doubled in size.
To check your dough to see if it is ready,stick your finger in it and if it leaves an indent it is ready. If the indent doesn't stay then the dough is not ready.
Step 6
After dough has risen ,punch down dough several times to remove any air bubbles. Divide dough in half and shape into two balls.
Take one ball at a time and roll out into a 14x7 inch rectangle.
Now spread melted butter over the top and then sprinkle with the cinnamon sugar filling.
Step7
Starting with 7 inch side,roll up. Seal edges and place seem side down into a medium sized greased loaf pan. Now repeat step 6 and seven to make your other loaf.
Step 8
Cover and let rise for about 30min or until the dough is 1 inch above the pan edges.
Step 9
Uncover and bake in the oven at 375 degrees for 40-45 minutes or until the bread sounds hollow when tapped.
Step 10
After the bread has baked remove from the pan. Mix the powdered sugar and milk together in a small bowl to make a smooth glaze. Pour the glaze over the top of the hot bread. Allow the the bread to set for 30 minutes before cutting to get the best results.
All right,now it is time for you to give it a try.
Have a look at ,my first attempt at making this bread vs the second attempt.
Here is the second time around
Much better and so yummy! I hope you enjoyed this.
Go have a look at the parties that I will be joining!
Turning the daunting into do able
Weekend warrior
Debbie doos newbie party
Anything goes
Terrific under 10
Nifty thrifty tuesdays
Wow us wednesdays
Get your brag on
Weekend wanderer
Friday, December 23, 2011
Canning lid ornaments
Last Christmas I had a ton of used canning lids leftover that I didn't feel like throwing away. I also had three rambunctious little kids that like to play with the Christmas tree. How do these two relate? Well I made kid friendly ornaments with the canning lids!
These are so fun and easy! But I must warn you, they are rather addicting.
This is a great way to use old Christmas cards or Christmas bags. In fact,I got most of my ribbon and ties from recycled Christmas bag handles.
All you need are the following supplies:
Hot glue
Decoupage medium or Mod podge
Canning lids and rings
Ribbon
Paper image or fabric
Felt
The snowman I have shown above was super easy. I cut out some fabric and mod podged it to the canning lid. I did a layer on the bottom of the fabric first ,when it dried I appled a liberal amount of Mod podge to the top of the fabric. After it was completely dry. I hot glued the rick rack around the back of the lid, followed by the ribbon handle. I then glued a felt circle to the back to cover all my mess.
For the more three dimensional ornaments I did the same thing,but I used the canning rings over the top of the lid and then glued the rick rack etc to the ring.
I am really happy with how these turned out. My kids take these around the house and I don't stress about it.
These are so fun and easy! But I must warn you, they are rather addicting.
This is a great way to use old Christmas cards or Christmas bags. In fact,I got most of my ribbon and ties from recycled Christmas bag handles.
All you need are the following supplies:
Hot glue
Decoupage medium or Mod podge
Canning lids and rings
Ribbon
Paper image or fabric
Felt
The snowman I have shown above was super easy. I cut out some fabric and mod podged it to the canning lid. I did a layer on the bottom of the fabric first ,when it dried I appled a liberal amount of Mod podge to the top of the fabric. After it was completely dry. I hot glued the rick rack around the back of the lid, followed by the ribbon handle. I then glued a felt circle to the back to cover all my mess.
For the more three dimensional ornaments I did the same thing,but I used the canning rings over the top of the lid and then glued the rick rack etc to the ring.
I am really happy with how these turned out. My kids take these around the house and I don't stress about it.
I am going to link up to a couple parties this week.
I am going over to
and
Monday, December 19, 2011
Liebster blog award
Oh my gosh am I late at announcing this,but hopefully better late than never. Ashley over at A to being creations gave me a liebster award! She is awesome! You have to see her blog, she is so creative! To share this generosity I get to pick five blogs that I love that have less than 200 followers. This is going to be hard....
Here is the full description of what this award means.
Here is my list of bloggers you should check out:
Magazine your home
Puddle jumpers creations
The uncluttered lifestyle
The green dresser
Piles of projects
Here was Asleys list
Remember to check out Ashleys blog here http://www.atobeingcreations.com/
Have a great day!
Connie
Here is the full description of what this award means.
The Criteria: The Liebster is meant to showcase bloggers who have fewer than 200 followers. This is all done in the spirit of pay-it-forward.
The Rules: You must mention and link to the person who awarded you the Liebster, and mention 5 other blogs with fewer than 200 followers who you think are worthy of the Liebster!
'Liebster' means "favorite" or "dearest" in German. This award, which originated in Germany, recognizes up and coming bloggers. In accepting this award, I agree to:
-Thank the person who gave me the award, and link back to their blog
-Copy and paste the award to my blog
-Reveal the 5 blogs I have chosen to award and let them know by commenting on their blog in hopes they
pay it forward by awarding it to bloggers they would like to honor.
Here is my list of bloggers you should check out:
Magazine your home
Puddle jumpers creations
The uncluttered lifestyle
The green dresser
Piles of projects
Here was Asleys list
Remember to check out Ashleys blog here http://www.atobeingcreations.com/
Have a great day!
Connie
Wednesday, December 14, 2011
Joyous signs
Hello there I am back. Remember me.....
The hard drive on our computer went down and so etc etc. No need to explain. Now here we are just days away from Christmas and what do I have to show from it besides a couple pounds? I have finally finished these little Christmas signs today.
Let me back up, I tried to paint these signs yesterday while I was yelling at my kids, my heart was racing and I was not in the right "aura" at the moment .I didn't stop painting though no,no I kept messing up and I was thinking that if I just did one more layer of paint then I would fix my issues. It didn't work and I hated the signs and myself so I went to bed a little sad. Hahaha isn't that dumb.
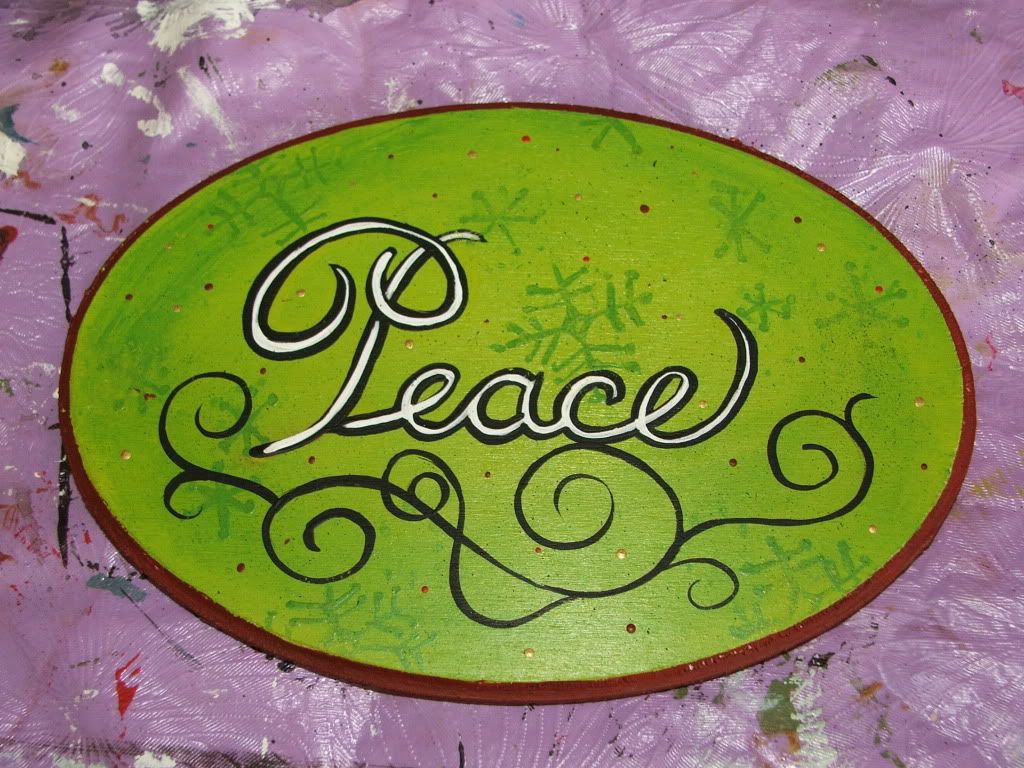
Here is what they looked like yesterday.
I think the most ironic part about this, is that I was painting words like Peace and Cheer when really I was feeling RAGE and FRUSTRATION!
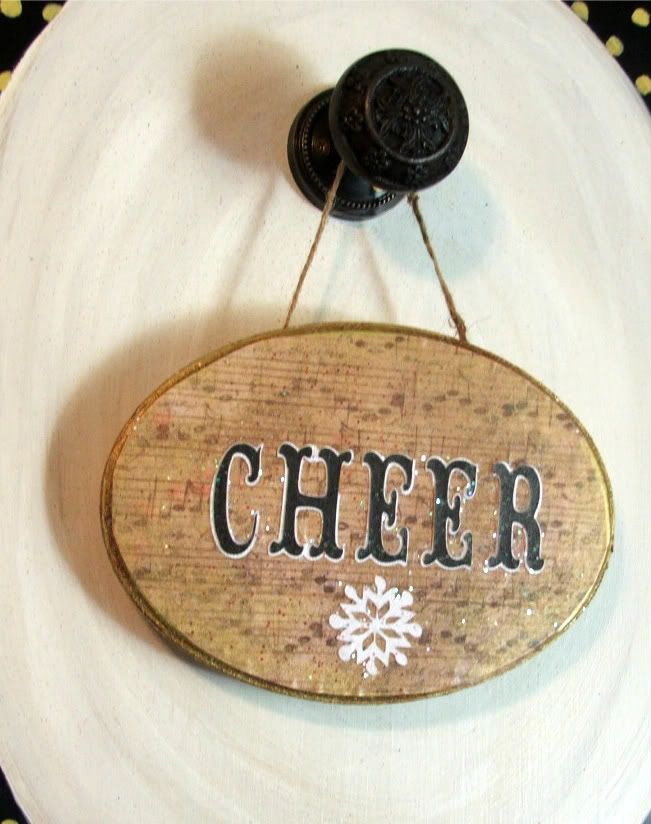
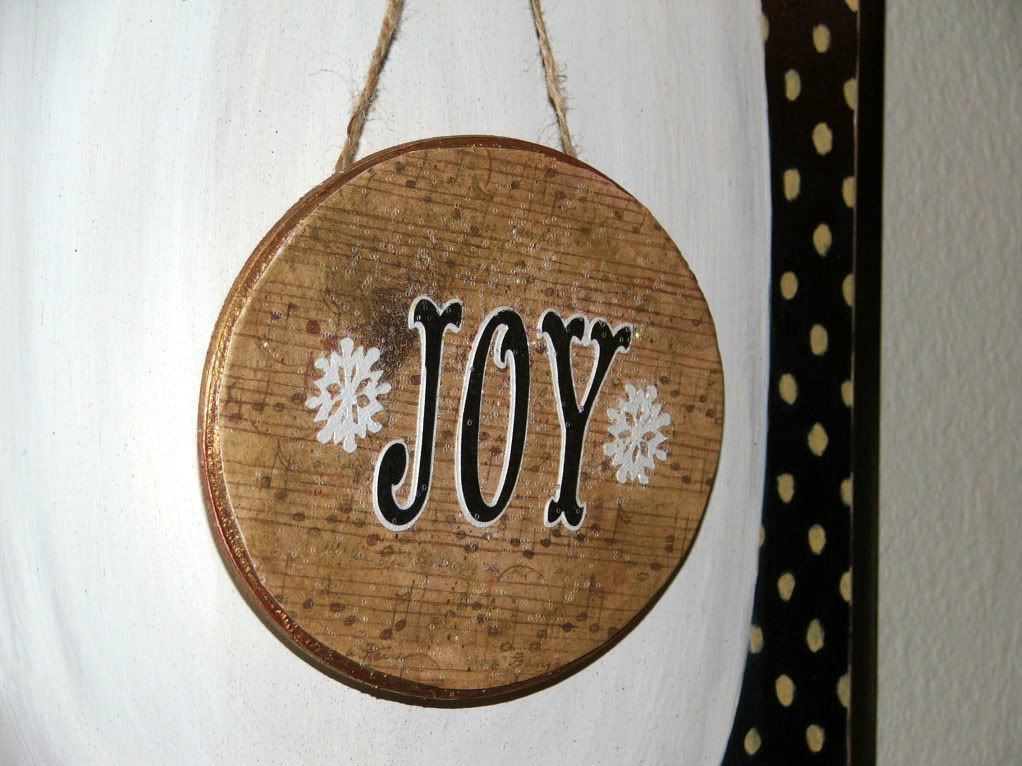
Anyway I didn't want to paint over these misfits again so I got out my mod podge and my "Cricut "machine. I got the machine last Christmas and I have only used it a handful of times. I don't my husband to think I am ungrateful and that I don' t love nice presents so now I can show him that I really do love his gifts.
These turned out really sparkly,but I couldn't get a good enough picture you will just have to visualize the glitter in your head.
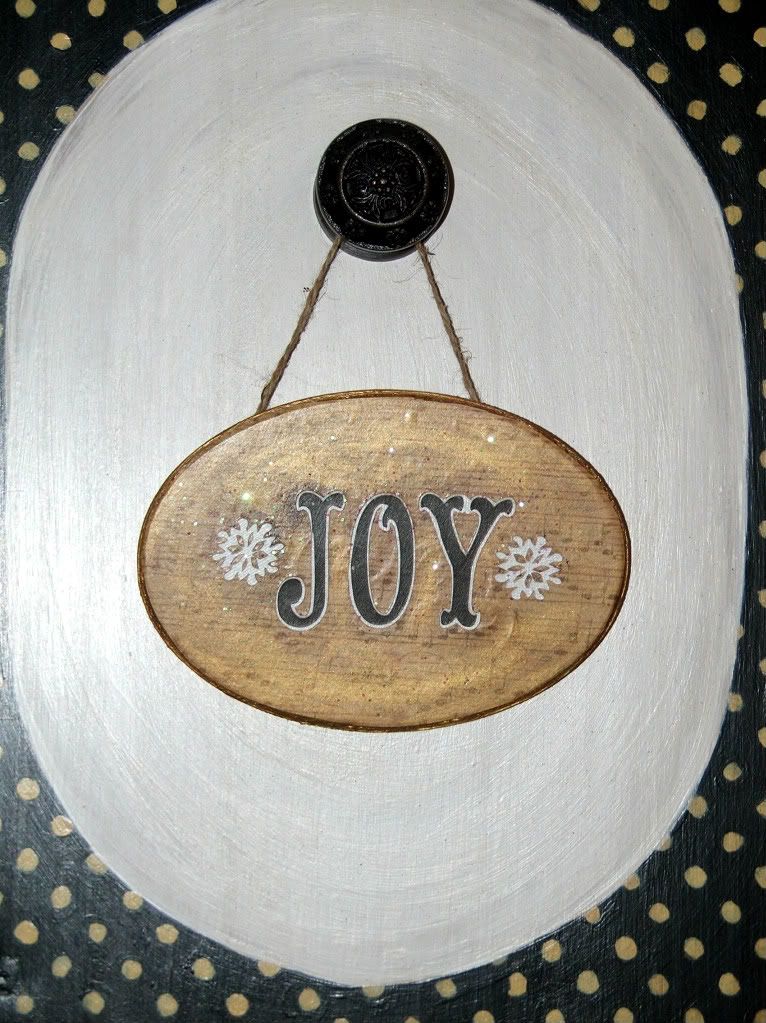
I am hanging these signs up on my Polka dot cabinet doors that I posted a couple weeks back.
So what is the words of warning here? If at first you don't succeed,dust yourself and try again.
And don't paint when you are mad.
I am going to link up with:
Terrific under 10 Tuesdays
Thank you for visiting!
Connie
The hard drive on our computer went down and so etc etc. No need to explain. Now here we are just days away from Christmas and what do I have to show from it besides a couple pounds? I have finally finished these little Christmas signs today.
Let me back up, I tried to paint these signs yesterday while I was yelling at my kids, my heart was racing and I was not in the right "aura" at the moment .I didn't stop painting though no,no I kept messing up and I was thinking that if I just did one more layer of paint then I would fix my issues. It didn't work and I hated the signs and myself so I went to bed a little sad. Hahaha isn't that dumb.
Here is what they looked like yesterday.
I think the most ironic part about this, is that I was painting words like Peace and Cheer when really I was feeling RAGE and FRUSTRATION!
Anyway I didn't want to paint over these misfits again so I got out my mod podge and my "Cricut "machine. I got the machine last Christmas and I have only used it a handful of times. I don't my husband to think I am ungrateful and that I don' t love nice presents so now I can show him that I really do love his gifts.
These turned out really sparkly,but I couldn't get a good enough picture you will just have to visualize the glitter in your head.
I am hanging these signs up on my Polka dot cabinet doors that I posted a couple weeks back.
So what is the words of warning here? If at first you don't succeed,dust yourself and try again.
And don't paint when you are mad.
I am going to link up with:
Terrific under 10 Tuesdays
Thank you for visiting!
Connie
Saturday, November 12, 2011
Polka dots for grown ups
Today I am excited to share with you "my old cabinet doors"! Well actually, they were from my friends old kitchen,but now they are mine and now they look new! Here is a looky loo.
I love polka dots don't you? And I wanted to find a place for them in my home besides my daughters room. Can you guess where I put these doors. For those of you that follow my blog,you will probably remember my "Bakery" Sign in my dining room. Here is what it looked like before...
And now.....
Okay so I am not the "photographer bug" ,but they look really cute in person. I plan on hanging seasonal decor from the hooks for every holiday. I bought the hooks at hobby lobby by the way. That was the first time I had ever been to that store and let me tell you, that place is AWESOME! I wish we had one closer.
Well here is how I made these.
This was the piece I took the doors from.
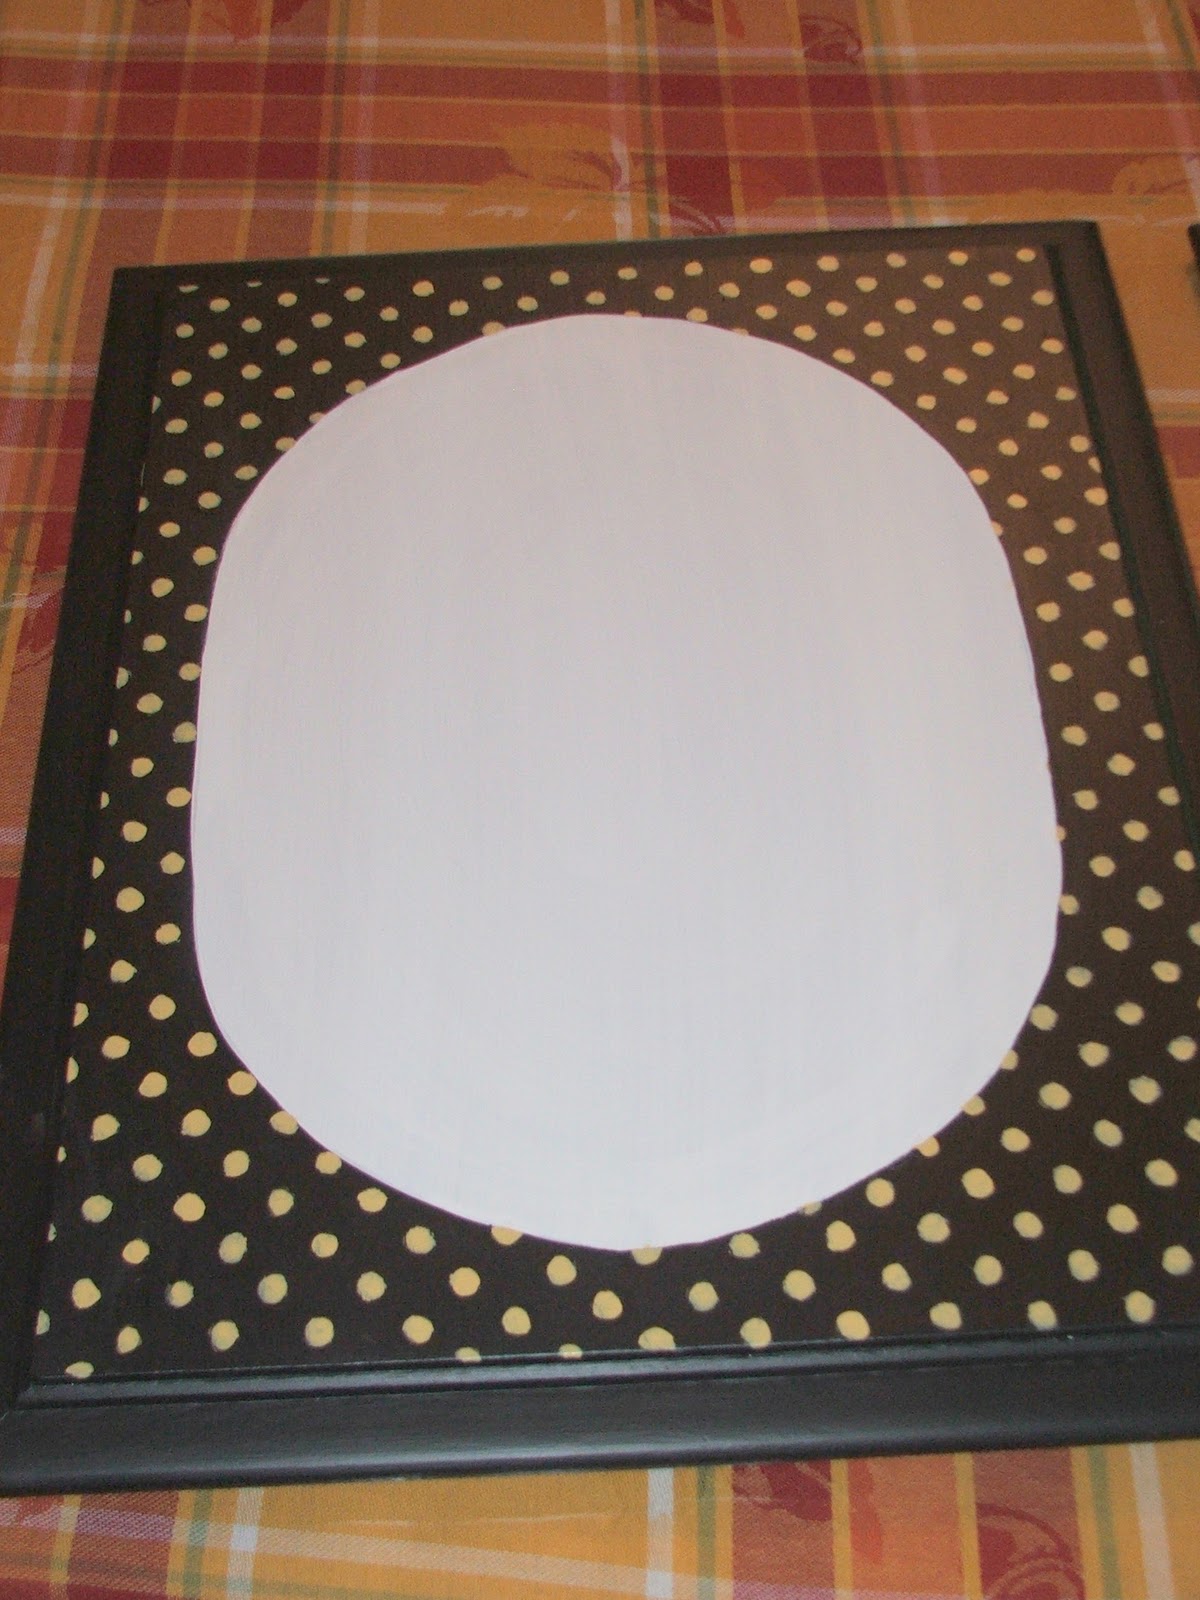
I sanded the wood,primed it and then cut out this little oval from a grocery bag.
Then I painted the black followed by the stenciled polka dots. Here is what it looked like when I was almost done.
I had so much fun making these doors that I am now in the process of painting another one. I will share that with you at a later time,if it turns out alright.
Thank you so much for stopping by.
I am going to party over at
Weekend warrior w/Ask Anna
Debbie doos newbie party
Anything goes w/ Type A
Terrific under 10 w/ At home with K
Turning the daunting into the do able
Connie
I love polka dots don't you? And I wanted to find a place for them in my home besides my daughters room. Can you guess where I put these doors. For those of you that follow my blog,you will probably remember my "Bakery" Sign in my dining room. Here is what it looked like before...
And now.....
Okay so I am not the "photographer bug" ,but they look really cute in person. I plan on hanging seasonal decor from the hooks for every holiday. I bought the hooks at hobby lobby by the way. That was the first time I had ever been to that store and let me tell you, that place is AWESOME! I wish we had one closer.
Well here is how I made these.
This was the piece I took the doors from.
I sanded the wood,primed it and then cut out this little oval from a grocery bag.
Then I painted the black followed by the stenciled polka dots. Here is what it looked like when I was almost done.
I had so much fun making these doors that I am now in the process of painting another one. I will share that with you at a later time,if it turns out alright.
Thank you so much for stopping by.
I am going to party over at
Weekend warrior w/Ask Anna
Debbie doos newbie party
Anything goes w/ Type A
Terrific under 10 w/ At home with K
Turning the daunting into the do able
Connie
Thursday, October 27, 2011
Diamonds in the rough
Hello and thank you for stopping by,
I am going to introduce you to two night stands that I have been working on for an embarrassingly long time. I bought these two night stands at a thrift store back in.....August. They were pretty ugly and stinky,but they had potential. I chose these pieces because they were solid wood, no cheapy fake stuff and I really liked the style. Here are what the little darlings looked like before.
What do you think? A little better huh? Of course anything would be better than what they were before.
I used the original white glass knobs and just replaced the screws inside. I then painted the tops of the screws with black spray paint.
My husband secured all of the loose corners and now we have ourselves two nice little dolls and you would never be able to tell that they had a bad past.
Here some other photos.
I am going to introduce you to two night stands that I have been working on for an embarrassingly long time. I bought these two night stands at a thrift store back in.....August. They were pretty ugly and stinky,but they had potential. I chose these pieces because they were solid wood, no cheapy fake stuff and I really liked the style. Here are what the little darlings looked like before.
What do you think? A little better huh? Of course anything would be better than what they were before.
I had to degloss and sand both pieces. I then added a light blue primer / paint by Olympic called "Lunar eclipse". After a couple of coats of blue paint,I painted on the decorative artwork. I painted the top and front images with black acrylic paint. I found inspiration for the paintings by searching online for "toile fabric"
After painting, I sanded down the corners and then I applied watered down black acrylic paint to all the sanded areas. After all my paint was dry I applied a couple coats of poly acrylic protective polish all over. To make these look and feel like new I even paint the backs, the bottoms and the all of the drawers inside and out.I used the original white glass knobs and just replaced the screws inside. I then painted the tops of the screws with black spray paint.
My husband secured all of the loose corners and now we have ourselves two nice little dolls and you would never be able to tell that they had a bad past.
Here some other photos.
Now I am going to do a daring thing and try to sell these on Craigslist!
Wish me luck!
Today I am going to visit these parties.
Wednesday, October 26, 2011
Happy little witch
I love Halloween decorations! I am not into scary decorating however,I like "cute and cuddly". I think what I especially love about Halloween decorations are all the colors you can use!
So anyway, a little history about this. I was getting ready to hop into bed about three years ago and this idea came to my head of a little witch flying on a cat with a green sky and purple city below. So I found some small canvases at Wal-mart and I painted three of these. They looked cute,but not finished.I have been hanging this picture up by a ribbon all these years so finally this year I decided to get a frame at a thrift store.
I painted the frame and now it looks like a more established decoration.
If in the future I find a more interesting frame with scroll work then I will probably change it,but for now we are happy.
Thank you for stopping by! Have a wonderful day.
I am going to go play over at these parties this week.
Terrific under 10 Tuesdays
Wow us wednesdays
Debbie doos newbie party
Connie
So anyway, a little history about this. I was getting ready to hop into bed about three years ago and this idea came to my head of a little witch flying on a cat with a green sky and purple city below. So I found some small canvases at Wal-mart and I painted three of these. They looked cute,but not finished.I have been hanging this picture up by a ribbon all these years so finally this year I decided to get a frame at a thrift store.
I painted the frame and now it looks like a more established decoration.
If in the future I find a more interesting frame with scroll work then I will probably change it,but for now we are happy.
Thank you for stopping by! Have a wonderful day.
I am going to go play over at these parties this week.
Terrific under 10 Tuesdays
Wow us wednesdays
Debbie doos newbie party
Connie
Subscribe to:
Posts (Atom)